Note: This topic describes financial statements for Report Designer. If you want to produce financial statements for Excel Reporting, see How to design layouts for financial data reports (Excel Reporting).
About the Cash Flow report
The Cash Flow report allows you to project your cash flow from the present year to five years in advance, based on your Sage 200 budgets. Values are per accounting period, not calendar month.
For each accounting period, you can see:
-
Opening balance.
For the first period this is the actual balances for the nominal accounts, nominated as bank or cash accounts in the cash flow layout. The values used are the actual balance at the end of the period before the first period on the report.
For all other periods, the opening cash balance is the closing cash position from the previous period.
-
Value for each income heading.
This value is based on the budgets for the nominal accounts associated with the income heading.
- Total cash receipts value (the sum of the values for all income headings).
-
Value for each expenditure heading.
This value is based on the budgets for the nominal accounts associated with the income heading.
- Total cash paid out (the sum of the values for all expenditure headings).
-
Closing balance.
This is the opening balance plus (total cash receipts less total cash paid out).
The Cash Flow report uses the actual balances for the nominal accounts, nominated as bank accounts in the cash flow layout.
Create a new layout
Open: Settings > Cash Book / Nominal Ledger > Financial Statement Layouts.
- Select Cash Flow.
- Click New.
- Enter a name for the cash flow layout.
- Click Edit.
Add your income
This is total income you've received, for example selling goods or services to your customers.
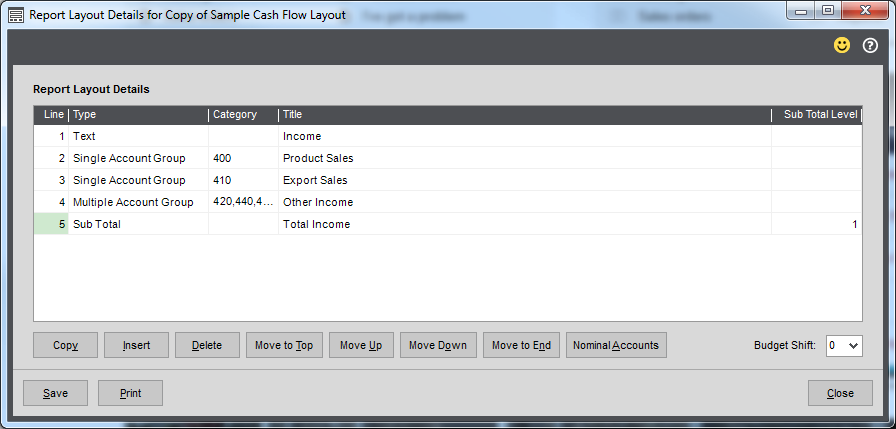
- Create a text line for your income section.
- Choose Text from the Type drop-down list.
- Enter the heading text in the Title column, e.g. Income.
- Choose a heading style: 1 - 9.
- Choose the report categories to include in your income section. This would usually be for your sales so add your Income report categories.
- Choose Single Account Group from the Type drop-down list.
- Choose the report category code from the drop-down list; e.g. 400 for Product Sales.
- Change the Title if required.
-
Repeat for all income report categories.
- Create a total for the section.
- Choose Subtotal from the Type drop-down list.
- Enter some text in the Title column, such Total Income. The text is bold by default.
Choose 1 in the subtotal level, as this adds up all rows above not included a subtotal.
- If you want to separate your income in to sections, repeat for further report categories and subtotal rows. Use 1 as the subtotal level.
- Add blank text lines or dashes to break up the report.
Add your expenditure
This is the cost you've incurred to allow you to sell goods to your customers, such as the cost of labour.
- Create a text line for your expenditure section.
- Choose Text from the Type drop-down list.
- Enter the heading text in the Title column, e.g. Outgoing.
- Choose a heading style: 1 - 9.
- Enter the report categories to include in this section. Add the relevant Expense report categories.
- Choose Single Report Group from the Type drop-down list.
- Choose the report category code from the drop-down list; e.g. 600 for Labour.
- Change the Title if required.
-
Repeat for all expense report categories.
- Create a total for the section.
- Choose Subtotal from the Type drop-down list.
- Enter some text in the Title column, such Total Outgoing. The text is bold by default.
Choose 1 in the subtotal level. as this adds up all rows above not included in a sub total.
Add your bank accounts
Associate bank nominal accounts with a cash flow report to calculate the cash flow opening balance.
- Click Nominal Accounts.
- Select the required bank nominal accounts from the list.
Budget shift
Select a Budget Shift control value to specify the number of periods with which to shift the underlying budgets to reflect credit days.
For example, if you select a shift of 1, then you can take into account that cash will be received one period after budget. If you select a shift of 2, then you can take into account that cash will be received two periods after budget.
Note: The Budget Shift applies only to incomes and expenses, not to actuals.
Print your Cash Flow report
- To preview your Cash Flow report as you're designing it, click Print.
- Once you've finished designing the report, to run the Cash Flow report select Nominal > Nominal Reports > Financial Statements > Cash Flow Report.